Tenant Admin
Configuring a signer
Turn on Cyfher-managed signing (recommended, zero-config), or bring your own HashiCorp Vault or YubiKey backend.
Every credential Cyfher issues is digitally signed by a key your tenant controls. Signing is what lets anyone verifying a credential confirm it genuinely came from you and hasn’t been tampered with. You don’t need to be technical to set it up — the recommended option does it for you automatically.
Open Signing in the portal sidebar to manage this.
Signing options at a glance
| Option | Where keys live | Good for |
|---|---|---|
| Cyfher-managed signing | In a hardened, audited vault Cyfher operates for you | Almost everyone — turnkey, one click to enable (recommended) |
| HashiCorp Vault Transit | In a Vault / OpenBao server you operate — Cyfher only ever sees signatures | Teams that already run Vault and want keys in their own infrastructure |
| YubiKey PIV | On a YubiKey 5-series device attached to your signing server | Low-volume, high-assurance hardware custody |
Sensitive backend config (Vault tokens, AppRole secret IDs, YubiKey PINs) is encrypted at rest by Cyfher before it touches the database.
Cyfher-managed signing (recommended)
This is the turnkey, zero-configuration default — and what we recommend for almost everyone. With a single click, Cyfher provisions a dedicated, isolated vault for your tenant, generates and stores your signing keys inside it, and operates them on your behalf. There’s nothing to install, no vault to run, no credentials to manage, and no cryptography knowledge required.
On the Signing page the recommended card sits at the top. Click Use Cyfher-managed signing — that’s the entire setup. Cyfher does the rest in the background.
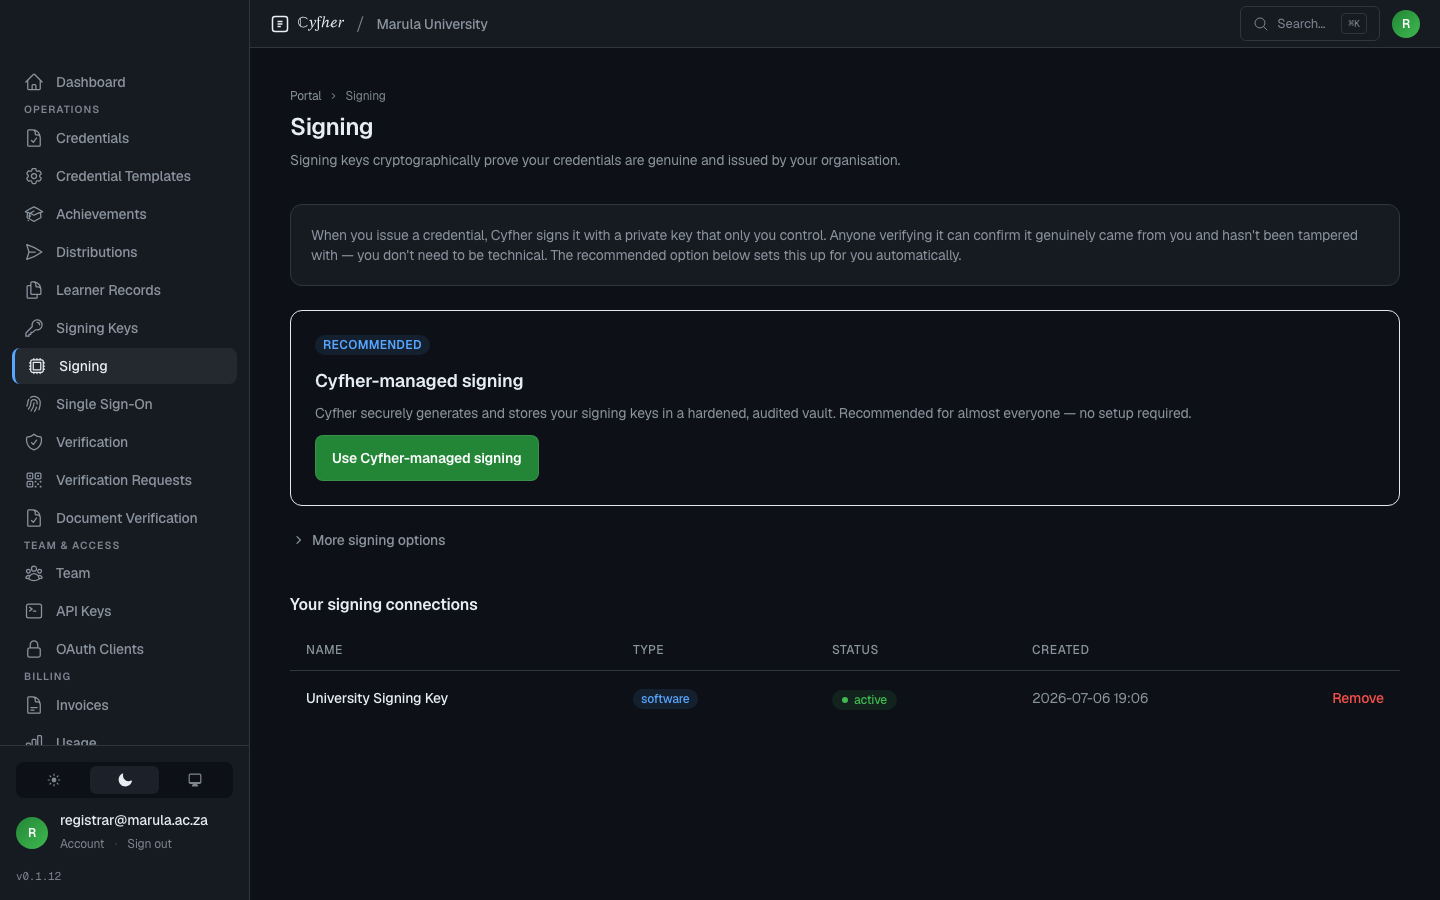
Setup runs in the background and the card reflects its progress:
- Setting up — Cyfher is provisioning your isolated vault, signing policy, and keys. This usually takes under a minute, and the page updates itself.
- Active — signing is ready. The card links to Manage signing keys, where your managed keys appear under Keys.
- Couldn’t finish — something went wrong during setup. Nothing was charged and your data is safe; use Try again, or contact support.
You can switch managed signing off later; already-issued credentials stay verifiable, because the public key needed to verify them lives in Cyfher’s database, not the vault.
Cyfher-managed signing becomes available once the platform has provisioning enabled for your environment. If the card says it isn’t available yet, use one of the advanced options below or contact support.
Advanced: bring your own backend
Under More signing options on the Signing page you can connect a backend you operate yourself. You’ll need connection details from whoever manages it — if that’s not you, the recommended Cyfher-managed option needs none of this. You can add as many connections as you like, and different credential configurations can sign with different backends.
HashiCorp Vault Transit
This connects a HashiCorp Vault or OpenBao server you operate that exposes the Transit secrets engine — it is not a generic cloud-KMS connector (there are no native AWS KMS, Azure Key Vault, or GCP KMS integrations). A hosted Vault service such as HCP Vault works too, as long as it speaks the Transit API. The server must be reachable from the Cyfher issuer over HTTPS, because Cyfher makes the signing calls to it directly.
Choose Connect your own vault and provide:
- Vault address — e.g.
https://vault.internal:8200. TLS (https://) is required. - Secrets engine path — the Transit secrets engine mount, typically
transit. - Authentication — either a long-lived token, or AppRole (role ID + secret ID). AppRole is recommended: Cyfher auto-renews the resulting token and rotates cleanly when the secret ID is rolled. Use Test connection to check the details before you save.
You should pre-create the Transit keys in Vault (e.g. vault write -f transit/keys/cyfher-issuer-1 type=ecdsa-p256) and grant the Cyfher AppRole sign permission on them. Cyfher resolves which Vault key to use from the signing key record, not the signer config.
YubiKey PIV
Choose YubiKey hardware key and provide:
- Serial number — the YubiKey’s device serial (printed on the device, also visible from
ykman info). - PIN — the PIV PIN. Cyfher encrypts this at rest; it’s never logged.
Caveats:
- The
yubikeycrate Cyfher uses supports EccP256 (ES256) and EccP384 (ES384). EdDSA / Ed25519 is not supported on YubiKey even though recent firmware advertises it — the Rust crate hasn’t implemented it yet. - One YubiKey can host four PIV slots (
9aAuthentication,9cDigital Signature,9dKey Management,9eCard Authentication). This form does not ask for one: the slot is carried in the signing key’s reference, which takes the formyubikey-<serial>-<slot>, and defaults to9cwhen unspecified. - The YubiKey must be physically present on the host running the Cyfher server during issuance. For multi-instance deployments this means pinning issuance to one node.
After saving
A bring-your-own connection appears under Your signing connections with a status indicator. Cyfher caches the NIF signer resource in ETS per config — first use after a restart incurs a connection handshake (Vault) or PIV touch (YubiKey); subsequent signatures are fast.
You can now reference a connection when you create a signing key under Keys, then attach that key to a credential configuration. (Cyfher-managed signing creates its key for you, so you can skip straight to the credential config.) See Creating your first credential config for the next step.